Friday, 23 September 2016

Creating a Wicking Garden out of Old Tyres

Living in Perth means that we have very poor, sandy soil and the summers are very harsh. Some of my less water-wise or established plants don't survive the heat and dryness. I have been experimenting with all kinds of raised beds and waterwise garden options to see if I could still have a lush garden throughout the year without having to use a lot of water from the tap.

 I did some research and found a lot of information about wicking gardens, so I decided to make some of my own. My car needed new tyres, so I asked the tyre place to give me my old tyres back and I would take them home and use them.
These are the materials I used: 
  1. two tyres
  2. some black liner to line the bottom tyre to hold the water
  3. some wood to fill the bottom tyre with (the wicking well). This will break down over time. You can also use rocks, gravel, bark chips, anything organic and chunky, really. I just had some little logs lying around and thought I'd give them a try
  4. Some rags, to separate the dirt from the wicking well 
  5. a piece of PVC pipe, which extends to the bottom of the wicking well, so you can fill it easily, and always see how much water is inside
  6. Some nice soil
I cut the black liner into a circle much larger than the tire. and placed it into the tyre.


Then I filled the bottom tyre with the wood, and placed the PVC pipe in so it reached to the bottom.


I put the rags on top, to create a barrier between the soil and the wicking well.
 
At this point, I moved the whole thing into position.

The final stage was to put the other tyre on top, and fill it up with compost and nice organic soil, and put my plant into it. I filled the well with water by putting the hose into the PVC pipe. Any surplus water should spill out the top of the bottom tyre. I wedged it open a bit with a thick stick to let that happen.

A piece of bamboo or other long stick poked in the PVC pipe will work as a fill meter, to see how much water is in the reservoir. No point topping up the water well if it is not necessary.

As you can see from the photo below, my Pepino plant is thriving in its environment. This is my most successful Pepino ever.


Sunday, 19 June 2016

Making a hugelkultur

Making a Hugelkultur

Last year I stumbled across a website demonstrating a "no water" garden, called a "hugelkultur, which is a raised garden bed filled with rotten wood. Intrigued, I eyed off the woolly bushes we had
Goodbye woolly bushes
at the side of the house, which were very old, rambling, and performing no useful function other than blocking us from the neighbour's house. In my eyes, this was a waste of productive land, since we had decided to make our 809 sq m block provide us with a sustainable food source some time ago.

The "no water" part intrigued me, since we live in Perth, a notoriously dry city with a hideously expensive municipal water supply. I liked the idea of "no water".  The idea is you dig a trough, fill it with a mound of logs, cover it with compost and mulch, and seed the heck out of it. As the logs break down, they generate heat, absorb water, and give out a constant supply of nutrients for 20 years or so. It takes a couple of years for the mound to break down enough to absorb water, so you need to water it through the hot months until that stage.

The problem of termites occurred to me, but, as I looked around, the little buggers were everywhere anyway, breaking down wood in both wanted and unwanted locations. By giving them something to work on, I was, in my mind, keeping them from bothering with my roof rafters. Plus you can buy termite traps and bury them near the lure, and help further keep them under control.

All the woody bits got piled up. We left one woolly bush
 at the fence to block the neighbour's view
So I let my husband have the chainsaw (always a risky decision) and pointed him to the woolly bushes. The trunks then formed the hugelkultur mound, and we chipped the rest and made compost with it.

The chooks (chickens?) had obligingly produced a mound of poop-covered bark chips and straw over the past few months. This, and the compost from our three compost bins, covered the mound, after I first laid out some weeper hose to water the mound for the first couple of years or so.

Then I went through our seed box, and emptied everything I could find onto the mound. Some seeds were old, so they didn't really germinate all that well.
My Hugulkulture is taking shape!

I decided to take the wire off at some point and I regret doing it as the mulch  slided down, exposing the hugelkulture. If I ever did it again, I would use a coarse wire and leave it there to break down, releasing zinc and iron into the mound.

To water it I installed five lines of dripper hose over the wood and under the compost cover, the underground type that will conserve water. Over time, as this breaks down, I will no longer need to water so much, but because we have such harsh summers, I think I'll leave it in.


So this is what it looked like going into the first summer. Not very impressive, but I have hope. It did give me a heap of very healthy looking kale and spinach over the winter.

Following a very hot long summer the hugelkulture had condensed down to the extent that the base wood was starting to show through.

Everytime we lay a barkchip mulch around (free courtesy of the local council), it drags nitrogen from the base as it breaks down. So this year, we emptied our compost bin over the hugelkulture, then covered it with 10cm or so free horse manure from the horse property around the corner. He was glad to get rid of the manure and we were glad to have a free, spreadable nitrogen source.

Then we covered the mound with bark chips to mulch it and flung a few handfuls of seeds over it. Then we planted strawberries, blueberries and goji berries into the top.

I"ll post updates as we go.

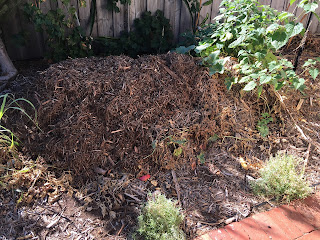
Update:  The photo below is our hugulkulture in its second year. Horse manure and bark chips have revived it, and we will get a massive crop of berries and garlic from it.

Saturday, 24 January 2015

Managing Dragonfruit

How to Grow Dragonfruit

Original planting, showing signs of serious nitrogen or iron deficiency
 I acquired some dragonfruit plants, at considerable expense from the local nursery, thinking I'd plant them along the neighbour's wall and they would grow into it and cover it up.

At the time my only experience with dragonfruit was in eating the fruit. I looked forward to the day I could eat my own. But, despite appearing to thrive by growing new shoots, my plants also went an alarming yellow colour.

I scoured the Internet, looking for a solution. Nobody else had dragonfruit that had gone yellow.

My next step was to research the growing conditions. Some sites said grow in poor soil (no problem there), and some others pointed out that dragonfruit are tropical and like rich, well-drained soil. That was more of a problem, as I had planted them along some concrete foundations into typical gutless Perth sand. No doubt the concrete is messing with the soil pH.
That buried lateral needs to go.

So I had three problems to fix: poor soil, pH, and the plant looked nothing like the lovely tall, weeping, productive plants on the Internet. Instead, it rambled, and could barely stay up. It needed to be trimmed into a manageable shape.

On checking the pH of the soil, it seemed to be a bit high (>9). I treated the soil with sulphur to bring it down. The dragonfruit likes soil with a slightly acidic pH 6.1 - 7.5 is its ideal range. 9 means it can't get the nutrients it requires, hence the yellowing.

Yellowing indicates (typically) nitrogen or iron deficiency
It may also need some nitrogen as we mulched it with bark chips. As they break down, bark chips rob the soil of nitrogen. So, I removed the bark chips and put in a heap of compost from the compost bin. I then mulched it with the bark chip/straw mulch out of the chook yard. It has been pooped on by six chooks for about four months, and so is high in nitrogen.

After about two weeks the yellowing is almost gone. I noticed, however, that on superduper hot days some burning occurred.

The next step was to turn the dragonfruit into something that looks like the pictures on the Internet.

The laterals that I removed. Note they were greening up nicely
 Taking some sharp secateurs, I snipped off all the laterals. These are sitting waiting for the wounds to callous, and then I'll plant them into pots. I'm not sure where I'll put them, but I'm sure I'll be able to squeeze them in. Dragonfruit have a very small footprint.

I hope to be harvesting fruit in two years time!
The finished product, now growing up a star picket.


Friday, 23 January 2015

Converting our Swimming Pool to a Natural Pond with Edible Fish (2)

Our lilies are blooming right now, and thriving in the stabilised pool
Why would we take a perfectly good swimming pool and make it go green?
because......

Now We Have Fish (and Marron)
 It took us about three months to stabilise our swimming pool so we could introduce plant life and not have it die. At this stage it is still an ugly swimming pool shape and leaves much to be desired aesthetically.

But we have plans.... Right now the focus is on getting the aquatic life balanced so we can see the bottom of the pool oops I meant pond. Then we'll work on making it more attractive.
Marginal plants sit temporarily on the pool steps
 I did some reading and discovered there are three types of plants I need.  Submerged, marginal and floating plants. All filter the water, by converting the nitrates produced from fish poop into leaves. They are expensive, so we are buying them a few at  time.
Floaty things look horrible but gets the plants into the deep end


We went to a local lake and Nick waded out into the mud and scooped up a heap of duckweed and azolla. We took two buckets home and dumped it in the pond. What we should have done, however, is first soak the weed in a strong solution of potassium permanganate ("Condy's Christals") for 24 hours before washing it and introducing it. This treatment would have killed the parasites which could infect the fish. It was after the weed went into the pond that I remembered my parasitology unit from my Medical Science days: a significant number of parasites rely on fish, snails and poop being part of the ecosystem for the lifecycle to continue.
Our silver perch have increased by 60%  in 18 days

Not to worry: we have no snails in the pond yet: lifecycle broken and crisis averted. Next time, however, we will take precautions when using wild plants.

On the fifth of January, 2015, I bought 30 silver perch and 10 marron. I had wanted barramundi but they were out of stock. I also wanted yabbies, however they had escaped their prison and run away during the Christmas break, and so were also no longer in stock.

With great excitement, we introduced our purchases into the pond. Because we are not loading up the pond, we don't need aeration: the surface area is sufficient for self-aeration from the wind. And certainly, even during the hot days, the fish have frolicked happily in the deep end.

Every morning I cook up an egg from the girls (our hens), chop it up finely, and toss it into the pond. The fish boil the water snatching the pieces of egg. The gambezi scarper with it in their mouths for later consumption, usually followed by 10 or so muggers, and the perch just hoover up the larger bits. Feeding fish is hugely entertaining!

Watching the silver perch hoover the larger egg pieces explains why we don't see any baby gambezi any more: they fit neatly into the perches' mouth. As the feeder fish, they are doing a great job! We could go away for a month, and our system will survive without us.

We think we have around 25 perch left. I think the marron got the rest because we have never seen any bodies floating on the water. I found half an adult gambezi floating in the pond the other day, neatly snipped in half:  evidence they are still hidden in the bottom of the pond.


Tuesday, 13 January 2015

Why Did We Turn Our Pool into a Pond?

Why Did We Turn Our Pool into a Pond?

On 22nd March, 2010, Perth suffered a terrible storm, with hail the size of golfballs. Billions of dollars damage was done, and it took months to clean up. At my home, we lost power for about 26 hours. We were really lucky,

However this got me thinking about how vulnerable we are to the elements. About how much we rely on the government and other organisations for our basic survival. And, on an unrelated note, how awful and tasteless the fresh food is in the supermarkets.

That's when I decided to abandon our dream for acreage for now, because that was not something we could do straight away. What we could do, immediately, is start making our suburban block of land less ornamental and more productive.

From that day forward anything I planted had to be food. Later, more adventurous plans started to evolve, such as killing our expensive (to run) swimming pool and growing fish in it instead, getting chooks, and growing meat rabbits to satisfy our protein requirements.
Grapes, Pepinos, an apple tree and mint all share a small plot of land

So I now have 46 food-bearing plants at the front of the house:
Lemon
Lime (2)
Apples (2)
Apricot (2)
Mandarin (2)
Nectarine
Sugar cane (2)
Pepino (2)
Peach (2)
Blueberries (5)
Dragon Fruit (3)
Locquat
Pawpaw (4)
Macadamia nut
Fig
This 2-year old pawpaw is bearing fruit
Pineapple Guava
Rosemary
Grapes (2)
Bush Fruit (2)
Pumpkin vines (2)
Cape Gooseberry (3)
Pear
Raspberry

Some are bearing fruit already, for example the locquat was self-sown a few years ago and this year we had a bumper crop. The apples have 4 fruit on them at the moment, and I have 14 figs on my juvenile fig tree!

It's not all working at the moment though: my dragon fruit are fast turning bright yellow. I think I put them too close to the concrete rendered wall between my property and the neighbour's, and the concrete foundations are affecting the pH of the soil. Tomorrow I am going to move them to more friendly soil.


Saturday, 10 January 2015

Converting our Swimming Pool to a Natural Pond with Edible Fish (1)

We had to drain half the water out of our pool to remove the excess salt

Converting our Swimming Pool to a Natural Pond with Edible Fish (1)

September 2014
In September we turned off our pool pump and noticed an immediate ~$200 a bill decrease in our electricity costs.

After a few days it took on an evil green hue. After a few more days we observed water beetles and mosquito larvae - lots of mosquito larvae - and deduced that the pool was ready to introduce fish. So we first went down to the local lake and caught (after much effort) about 17 minnows to keep the mosquito larvae at bay.

These turned out to be gambezis, which are a bit of a nuisance here, apparently. Not surprising, apparently, as according to Wikipaedia: Fertilization is internal; the male secretes milt into the genital aperture of the female through his gonopodium.[3][9] Within 16 to 28 days after mating, the female gives birth to about 60 young.[3][10] The males reach sexual maturity within 43 to 62 days. The females, if born early in the reproductive season, reach sexual maturity within 21 to 28 days; females born later in the season reach sexual maturity in six to seven months.[1]

Apparently our females were born early in the reproductive season. By Christmas, we had about 3 million gambezis in our 55,000 litre swimming pool. They thrived. And, within a few short days, they had dealt with the 3 million or so mosquito larvae. One problem solved.

About the same time I bought some (expensive) aquatic plants. They promptly died. So we took some water to be tested and found we had about 6000 ppm salt. About twice the concentration that plants could tolerate. Hmmmm we should have done that first.

A few rains later, we took some more water down. No change in concentration. The gambezis loved the briney water, but the plants didn't. That's a problem for a natural pond, which relies on plants and fish being in some sort of balance.

That's when we drained the pool. The lawn didn't like it much: it died as well. Oh well.

About this point we got some advice and found we needed some gravel on the bottom of the pond. Our advisor thought it would be a good idea to take the depth out of the pool, and put enough blue metal in the bottom to make the entire pool about 1 metre in depth.

It took one trailer load of blue metal to realise that we needed to spend about $1,800 in blue metal to get the depth about right. Another plan bit the dust. We put about 4 inches of blue metal in both the deep and shallow end, and filled up the deep end with bricks and rocks to provide "hides" for fish and the marron we want to keep. It's ugly, but I reckon the plant life I am planning will hide the bottom from critical eyes. The pool took on a thick bluish sludgy hue, and I feared for the gambezi.

At this point we filled the pool back up with fresh water and let it settle. Once the rock dust had settled, the gambezi became visible. In the meantime they had doubled in numbers. These guys are hardy! No wonder they are considered a pest.